
15 macOS Power Tricks for Security Pros
I’ve been using macOS on a daily basis since 2004. I’ve used every version of the OS since OSX Panther (released in October 2003), and I have beta-tested every version of macOS on an annual basis since Lion 10.7 (released in July, 2011). While this may sound like a long time to some, it is certainly not as long as some of my macOS friends nor as long as some of my macOS colleagues at SentinelOne. Even so, one would think it should be long enough to have learned pretty much everything there is to learn about Apple’s Desktop environment. Alas, that is far from the case. Apple’s operating system never fails to hold some new surprise. Tricks with option keys, for example, can lay undiscovered for years, and with Apple’s annual release cycle, who knows how many yet-to-be found tricks remain unearthed?
Nevertheless, over the years I have come across and regularly use a number of tricks that I find particularly useful in relation to macOS security tasks, whether that’s writing code, hunting for threats, recording malware behaviour or triaging infected machines. In this post, I wanted to share some of these in the hope that others may find them useful. So, without further ado, here’s 15 of my most used macOS Power Tricks for Security Pros!

1. Find Bundle Id Of Any Application
Trick
lsappinfo list | grep or
grep -A1 -i bundleidentifier "$(mdfind -name .app | head -n 1)"/Contents/Info.plistDiscussion
Bundle IDs (bunde identifiers) are unique identifiers for every application on a given Mac device. Regular bundle IDs take the form of “com..”, such as
com.apple.finder
Bundle IDs are set in the application bundle’s Info.plist file and are registered in the Launch Services database as soon as the bundle is written to disk. As such, if you know an application’s bundle ID, it is very easy to find its location without having to expend unnecessary processor resources as you would using the Finder or the shell find command.
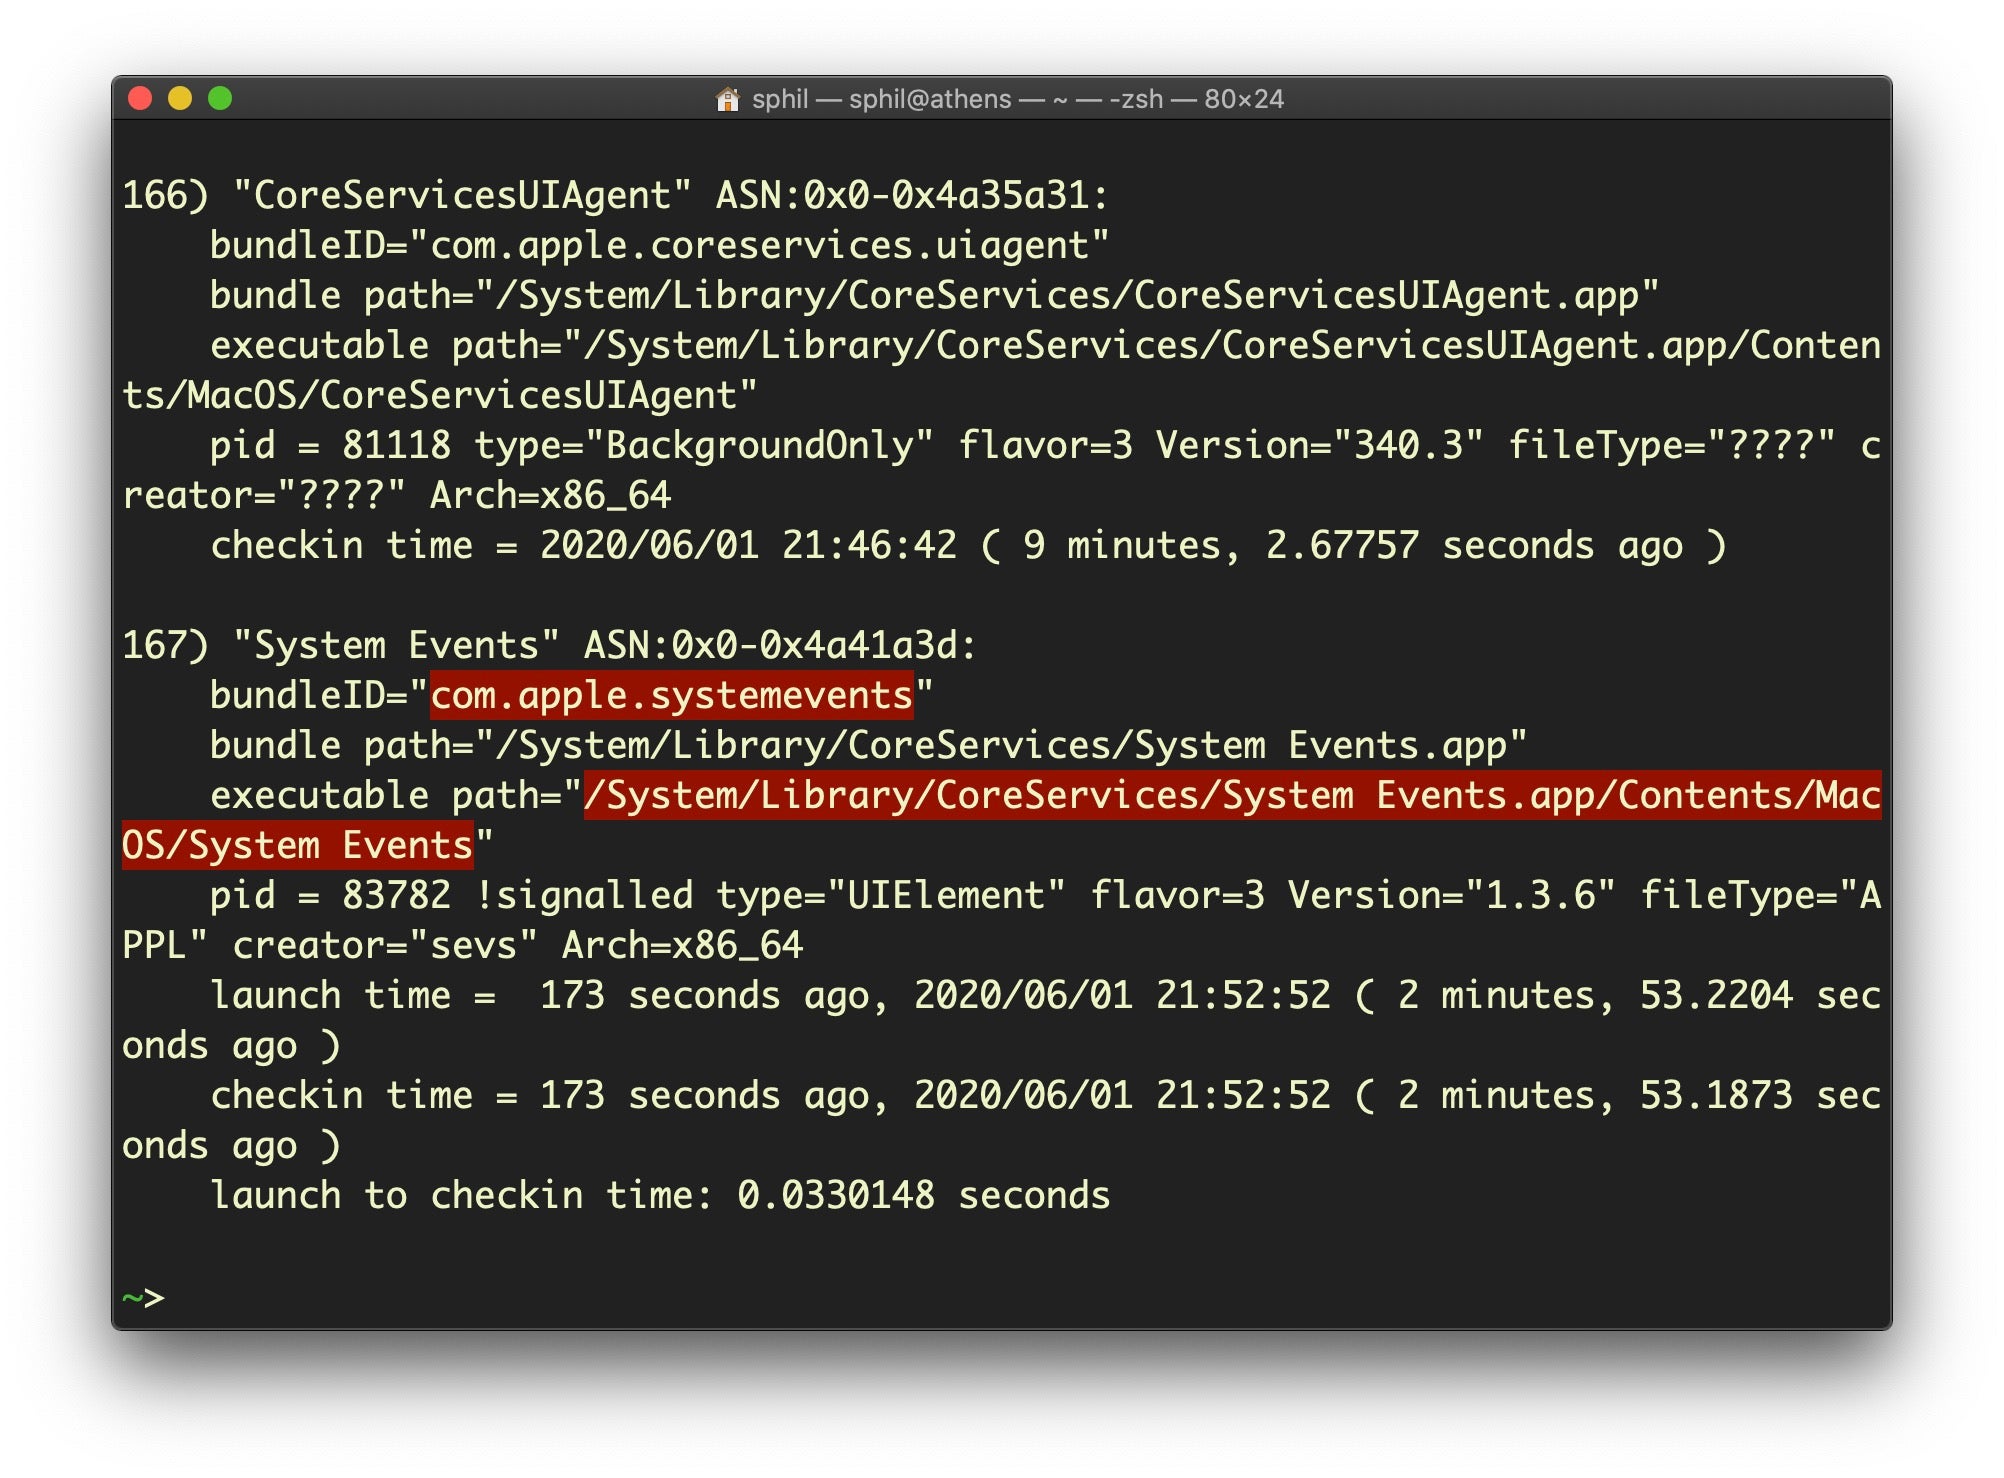
The first example uses lsappinfo to query all running applications and greps for the bundle ID from the output. This utility’s listings are very informative, and can tell you not only the bundle ID but also the executable path, current PID and many other details. See the man page for more details.
However, you may want to find the bundle identifier of an application that is not currently running. For that, use the second version that leverages the mdfind utility.
Note that mdfind only shows results for files the user has permission to access: it’s why you don’t get all those permissions errors that you do with the regular ‘find’ command (unless you redirect stderr to /dev/null). But that’s OK, since the entire Launch Services database is relative to the user: it’ll only return results for apps that the user has permission to launch, anyway.
2. Find Apps Lacking the Hardened Runtime
Trick
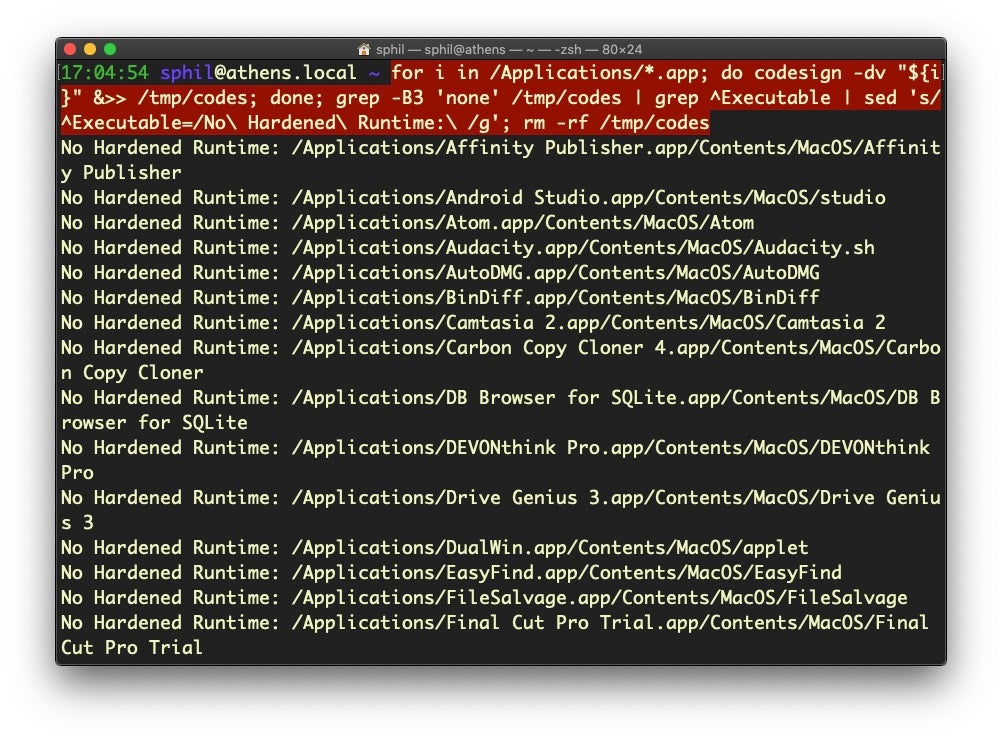
for i in /Applications/*.app; do codesign -dv "${i}" &>> /tmp/codes; done; grep -B3 'none' /tmp/codes | grep ^Executable | sed 's/^Executable=/No Hardened Runtime: /g'; rm -rf /tmp/codesDiscussion
As of macOS 10.15 Catalina, by default, all applications must be notarized in order to launch, but there are some get-out clauses that mean there could be unnotarized apps on your system. First, users can locally override the requirement for notarization, and this does not require Administrator privileges. It’s a common macOS malware technique to socially engineer the user into doing just that. Second, Apple flip-flopped somewhat on notarization requirements in the early stages, and apps that were notarized and installed prior to February 2020 under less strict requirements, such as not having the hardened runtime, will run just fine on Catalina even after the stricter requirements came into force.
It is possible to check whether an application does not have a notarization “ticket” stapled to it if you have Xcode tools installed with a much shorter one-liner:
for i in /Applications/* ; do stapler validate "${i}"|grep -B 1 -v worked;doneHowever, that’s problematic on two counts, quite apart from the fact that it requires Xcode command line tools.
First, apps can be notarized without the ticket; and indeed, many developers attach the ticket to the DMG or installer rather than the application itself, so simply checking for the ticket will not yield accurate results.
Second, the main benefit of notarization from a security point of view is that, under the strictest rules, it requires the hardened runtime flag. Apps without such a flag can be modified by malicious processes, so with this trick what we want to do is actually list all applications in the Applications folder (of course, you can and should think about applying the same technique to other folders containing applications), and then testing whether each lacks the required flags. The one-liner outputs the results of codesign to a temporary file, then greps the file for those entries that have no flags at all, indicating that there’s no hardened runtime. The one-liner also cleans up this temporary file after outputting the list of executables matching the search.
3. Find Devices Connected To Your LAN
Trick
while true; do clear; arp -alnx; c=$(arp -alnx | wc -l); let n=$c-1; printf 'tCount: t'$n'n'; sleep 2; done;Discussion
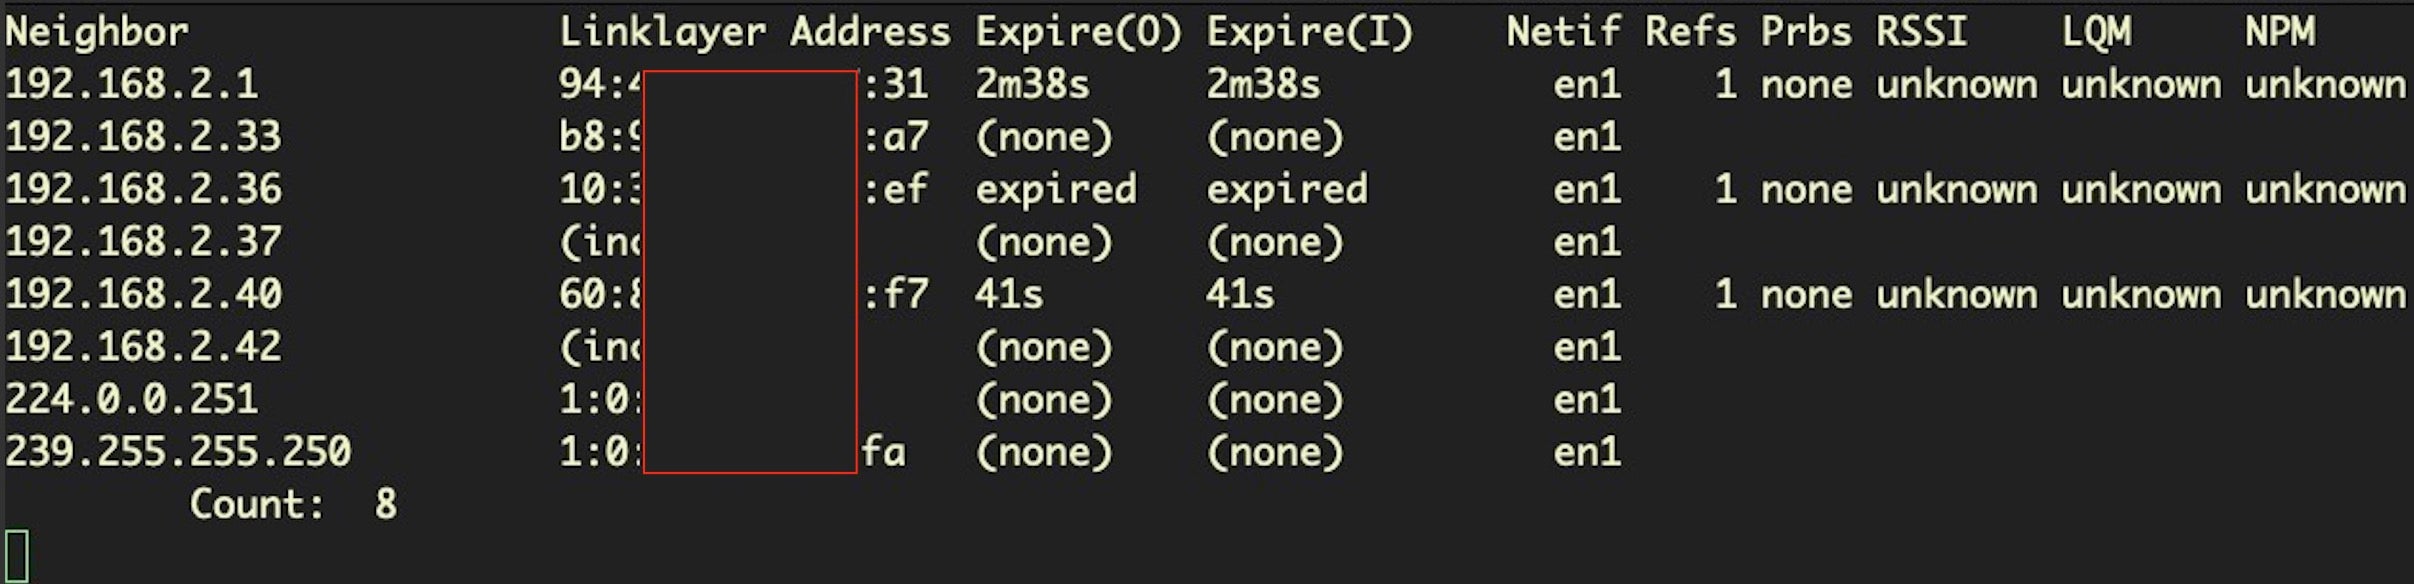
This one-liner leverages the arp utility to print out information about devices connected to your LAN, including the local IP address, MAC address (aka Linklayer Address) and expiry times, among other things. The command uses an infinite while loop on a 2-second delay, so that it continuously updates until you interrupt it with the keyboard command Ctl-C.
If you also keep an inventory of allowed MAC addresses on your network, this can be a very easy way to manually spot rogue devices that appear on your home, lab or other small network. For an automated enterprise solution, use something like SentinelOne’s Ranger.
4. Inflate a File, Change It’s Hash
Trick
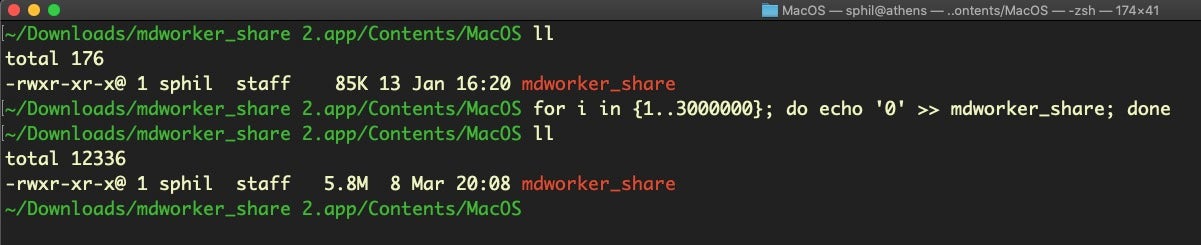
for i in {1..3000000}; do echo '0' >> ; doneDiscussion
When testing known malware there are circumstances when you might need to change the file’s size or hash in order to beat security detection rules. This trick was discussed in our recent post on how to bypass XProtect on Catalina, but that’s certainly not the only reason why you might want to use it. Any file-size check can be beaten this way, as well as any reputation check against a file’s hash. In the latter case, there’s no need to inflate the file with anything more than a single byte, so adjust the second number in the condition from 3000000 to anything from 2 to a number just a little larger than the size mentioned in the rule you’re trying to defeat.
5.Find Names Of All Logging Subsystems
Trick
ls -al /System/Library/Preferences/Logging/Subsystems | awk '{print $9}' | sed 's/.plist//g'Discussion
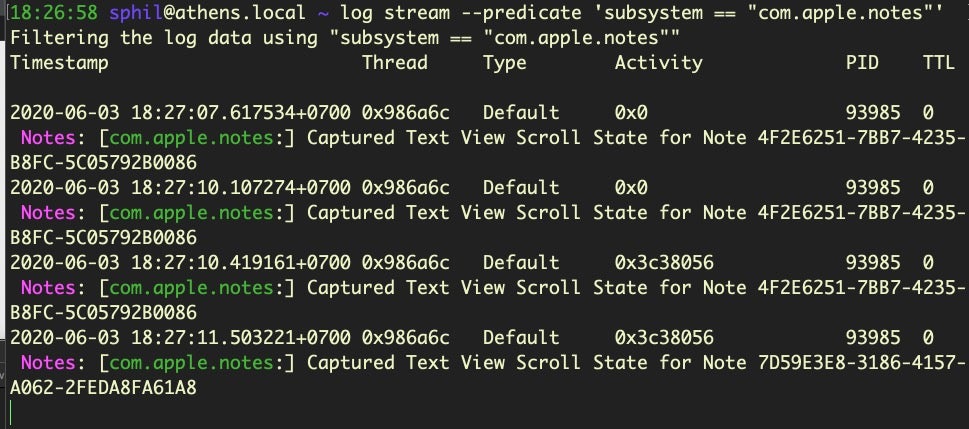
Apple’s built-in log utility gives you access to system wide log messages created by os_log, os_trace and other logging systems. The universal logging system is a powerful utility once you get the hang of how to use it. That requires clearing a couple of hurdles, though. One is getting used to using predicate-based filtering. Another is knowing which subsystems are available for you to query.
In this trick, we pull all the available subsystems from the system and print them to stdout.
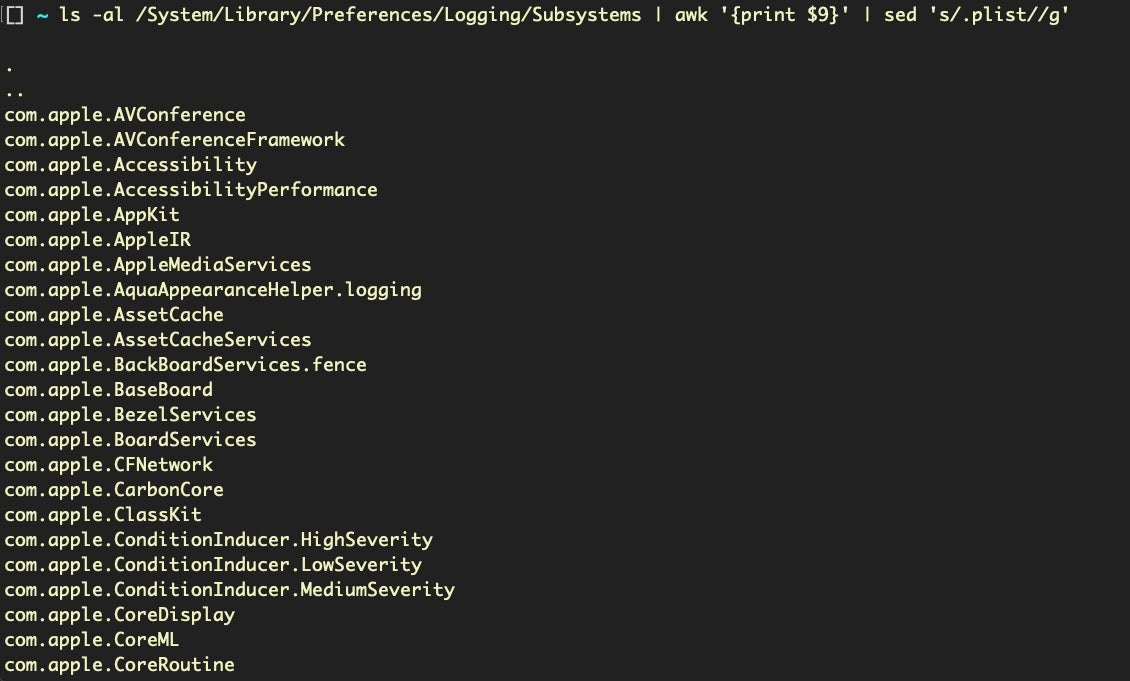
With this list, we can now refine searches to particular areas, which is ideal for bug hunting and vulnerability assessment.
6. Find Applications with Full Disk Access Permissions
Trick
sudo sqlite3 /Library/Application Support/com.apple.TCC/TCC.db "SELECT client,allowed FROM access WHERE service == 'kTCCServiceSystemPolicyAllFiles'" | grep '1'$Discussion
Full Disk Access (FDA) is a user protection mechanism that was introduced in macOS Mojave and considerably expanded in macOS Catalina. Whether it’s actually very effective at offering real-world protection is debatable, but there’s no arguing that for developers and power users it is often the cause of frustration as many common application and script functions will fail to work unless the executing process has FDA permission.
This trick allows you to quickly determine which applications on a given device have been granted that permission. In most cases, the output should accord with what you see in System Preferences’ Security & Privacy pane (see ‘Full Disk Access’ under the Privacy tab). However, if your device is managed by an MDM solution, then System Preferences will not show you all the items that actually have Full Disk Access permission, so this trick also comes in handy in that scenario. Note the use of the sudo command: you will need Administrator privileges in order to read the the TCC SQLITE3 database.
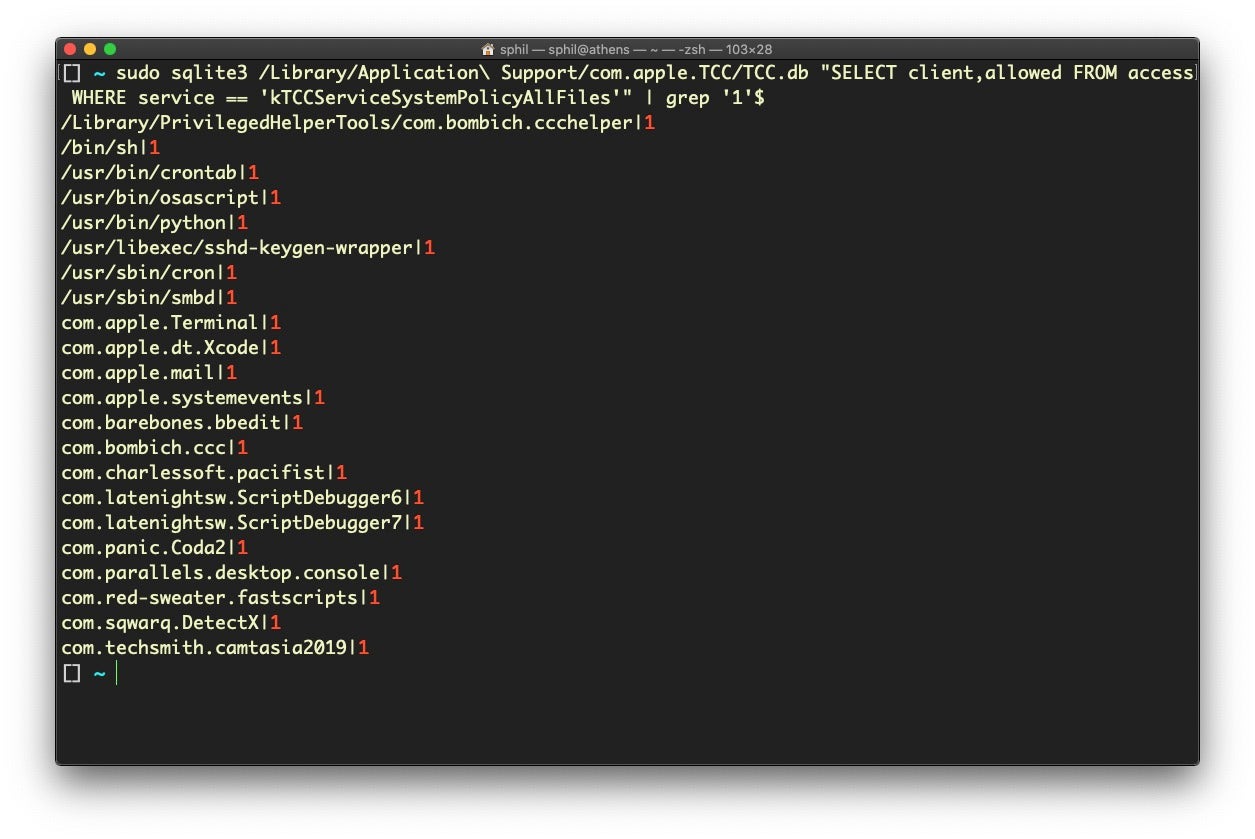
It’s also worth noting that if you leave off the call to grep at the end, you’ll see a longer list of entries, with the additional ones having a 0 at the end. These are apps that have appeared in the list of FDA but are not currently enabled.
7. Get the Mac’s UUID, Board-ID
Trick
ioreg -rd1 -c IOPlatformExpertDevice | grep UUID | awk '{print $NF}' | sed 's/"//g'Or
/usr/sbin/system_profiler SPHardwareDataType | grep UUID | awk '{print $NF}'Discussion
This is a common trick used by macOS adware and is useful for a number of reasons. From an attacker’s point of view, the IOPlatformUUID is a good way for threat actors to keep track of compromised victims, and the UUID can be sent as part of a URL from the victim’s machine to the attacker’s C2. From a defenders point of view, it’s worth monitoring calls to ioreg and system_profiler that are specifically seeking out the IOPlatformExpertDevice property or parsing for the UUID.
Note that the “board-id” key in the same property list for ioreg is one of several ways a malicious process can tell whether it’s running on bare metal or inside a (researcher’s) Virtual Machine.
ioreg -rd1 -c IOPlatformExpertDevice | grep board-id 

Similarly, getting the full Hardware Overview from system_profiler provides a lot of useful environmental information (use the same command as above, but remove the call to grep and everything after).
The system_profiler command is essentially the command line version of the System Information.app located in the Utilities subfolder inside the Applications folder. Use system_profiler -listDataTypes to see all the different sections you can query. As always, the man page will furnish you with other useful information on the utility.
8. Convert a String from Hex to ASCII (and back again)
Trick
echo '' | xxd -r -pOr
echo 'hello world' | xxd -pOr
echo 'hello world' | od -t c -t x1Or
python -c "print bytearray.fromhex('')"Discussion
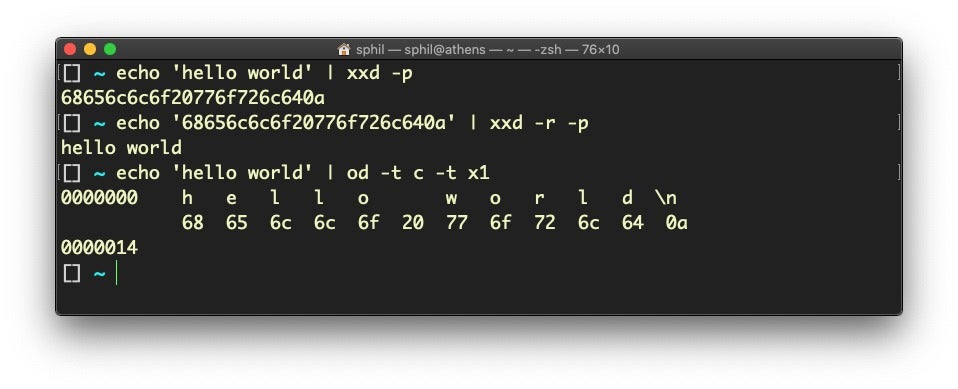
If you have anything to do with security, it’s almost inevitable that you will be regularly faced with the prospect of converting between hexadecimal encoded strings and ASCII characters. There’s actually quite a few ways to do it, depending on your preference, as the code above shows. Personally, I prefer using xxd because it’s quick, easy to remember and short to type. Be sure to use the -p switch to get a nice continuous printed string. The -r switch lets your reverse the hex back to ASCII.
The od utility provides a somewhat different output, showing each byte in both ASCII and hex in parallel, which can be useful in circumstances where you want to visually compare each byte against its ASCII representation.
9. Batch Convert A Folder of PNG Images To JPEG
Trick
mkdir jpegs; sips -s format jpeg *.* --out jpegsDiscussion
Another common task in the security field, whether you are penetration testing, researching or writing, is taking screenshots. By default, the macOS screencapture utility will use .png format. However, if you’re uploading screenshots to webpages, JPEG format is usually preferred as these files are lighter and make pages load faster.
Although you can change the default file format of screencapture (see man screencapture), I find it useful to leave the default as .png as it’s often the preferred format for many other tasks. Fortunately, this one-liner will pretty much instantly iterate over all the images in the current working directory, create a new folder called “JPEGS” and populate that folder with copies of all your PNGs in JPEG format. The sips tool is a little-known utility with a great deal of useful functionality. Check out man sips for the wealth of other options.

10. Hide All Files on the Desktop
Trick
chflags hidden ~/Desktop/*And
chflags nohidden ~/Desktop/*Discussion
Another trick related to recording and reporting: in the event you need to take a screencapture or screen recording of your Desktop, there is an alternative to moving or deleting all your Desktop clutter, which is to temporarily hide all Desktop files with the chflags utility.
Note that while this is unrelated to another trick for using the Finder to show/hide invisible files with the keychord Command-Shift-Period, if you’ve enabled invisible files in the Finder using that keychord, you’ll also need to invoke the Finder keychord again to toggle that setting to ‘off’ for this trick to work.
Don’t forget after you’ve taken your screencapture or recording to reverse the invisibility using the nohidden flag.
11. Encode/Decode URL Strings
Trick
alias urldecode='python3 -c "import sys, urllib.parse as ul; print(ul.unquote_plus(sys.argv[1]))"'And
alias urlencode='python3 -c "import sys, urllib.parse as ul; print(ul.quote_plus(sys.argv[1]))"'Discussion
Percent-encoded URL strings are a common enough occurrence that I find it useful to have an alias defined in my shell .rc scripts for dealing with them, particularly for decoding. Although this trick uses Python 3, there are many other ways to do this using different tools: Python 2, Perl, Ruby, pure Bash and Zsh to name a few, with varying degrees of accuracy. I prefer the Python 3 one personally as in my experience it’s the most reliable, but naturally YMMV.

12. Create a Randomly-Named File or Directory
Trick
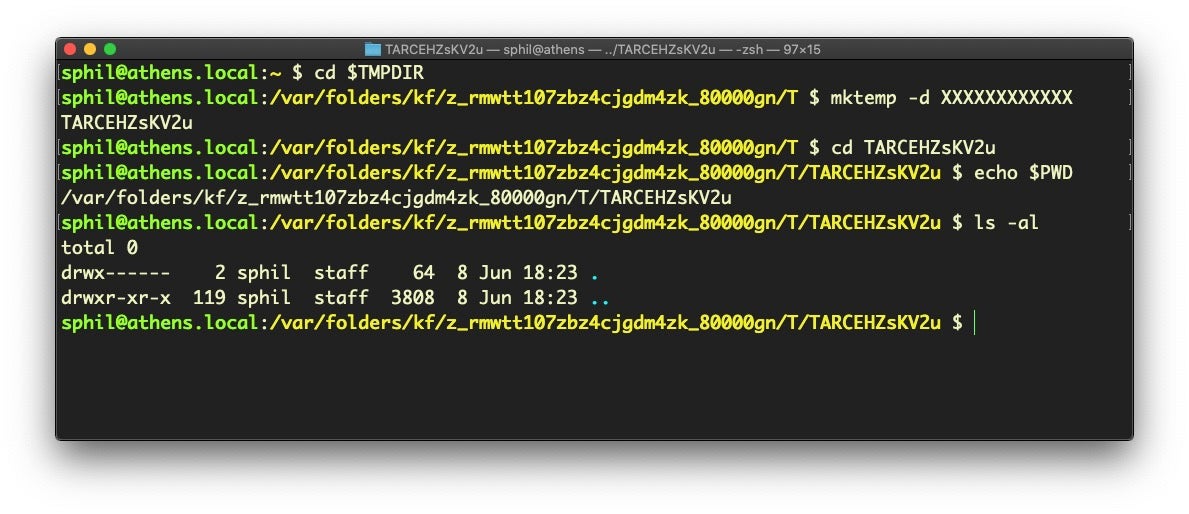
mktemp -d /tmp/XXXXXXXXXXXXDiscussion
Use the mktemp utility with or without the -d switch to make a randomly named file or directory, respectively. You do not need to specify the /private/tmp directory; you could equally use the $TMPDIR directory or any other directory you wish: the utility will create the randomly-named file or directory in the current working directory if no path prefix is given.
Randomly named temp files are useful in defensive programming to ensure that attackers cannot predict the path of temporary files where you may need to locate application or program resources. Similarly, they are used by attackers to drop malicious files in the Temporary directory and other locations with random names to help them evade simple path-based detection heuristics and YARA rules that try to lighten the load on resources by specifying particular locations.
In the example above, I use 12 Xs to generate a suitably difficult-to-guess random name. However, defenders (and attackers) can to a certain extent defeat this trick though judicious use of regex search patterns.
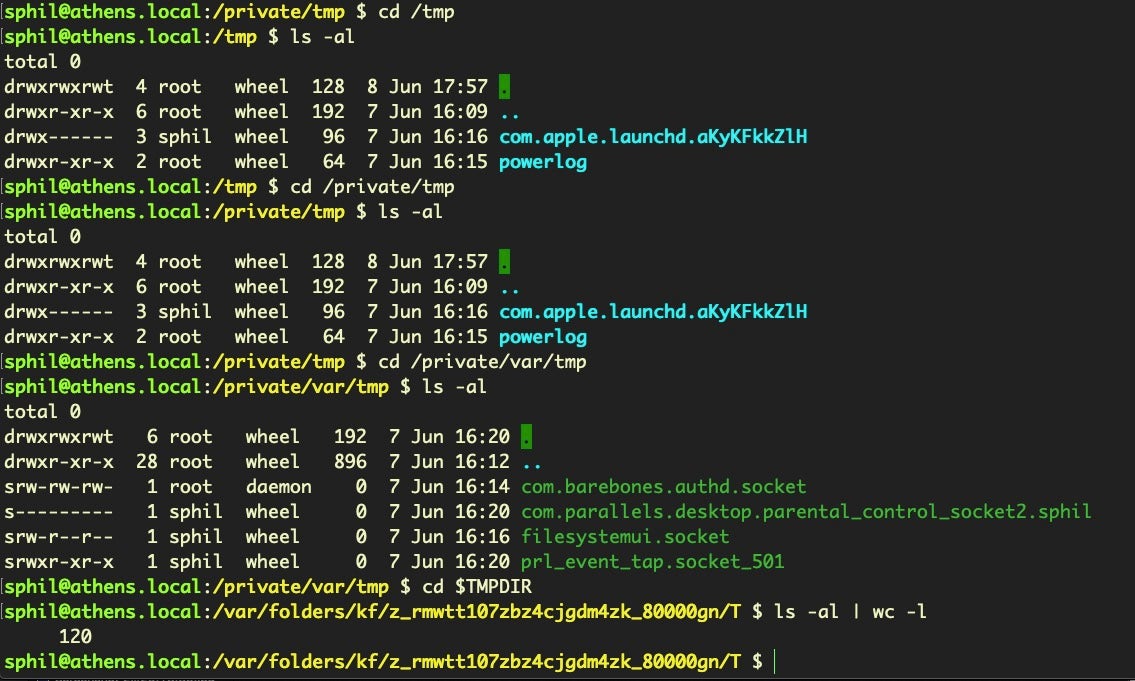
As an aside, be aware that there are a number of different temporary directories in use on macOS. While /tmp is an alias for /private/tmp, both /private/var/tmp and $TMPDIR are entirely different locations, as evidenced by the listings for each in the following image. We show the count from ls -al rather than the directory listing for $TMPDIR simply because there’s so many files there it would not fit conveniently into a screenshot.
13. Use Swift as a Scripting Language
Trick
#!/usr/bin/swiftOr
#!/usr/bin/env swiftDiscussion
The advantage of using Swift as a scripting language is that it allows you to run code from text files that can natively call out to Apple Cocoa APIs. With access to code in the Foundation, AppKit and other frameworks, you can build portable scripts that are just as powerful as native binaries, which is ideal for red or blue teamers.
Using Swift in this way is dependent on the existence of Xcode’s command line tools on the target machine, so this restricts your targets primarily to developers – a sizeable bunch who are often reluctant to install security controls, and a tasty target group if you are thinking about supply-chain attacks and lateral movement – or installing the dependency as part of your post-exploitation. You can avoid the dependency altogether, however, by turning your scripts into Swift binaries on your own machine and then importing the binary to the target device. To do so, simply remove the shebang from the script and use the swiftc compiler to rapidly create a native Mach-O binary:
swiftc my_script.swift -o my_scriptUsing Swift as a scripting language obviously requires knowledge of Swift itself, but a very good intro can be found on Derik Ramirez’s excellent website here.
I would sound one note of caution here about using the #!/usr/bin/env form of this or any other scripting shebang. Developers often recommend this practice because it ensures that the shell will find the executable even if it isn’t located at the standard path or if there are multiple versions of the executable (think Python 2, Python 2.7, Python 3, etc). However, from a security point of view, this introduces a potential vulnerability. As env will use whatever executable appears first in the user’s $PATH with the name specified (e.g., Swift), it could be possible for a malicious process to drop a cuckoo binary at the top of a user’s Path and have that executed instead of the real Swift binary. For that reason, I would recommend always using the absolute path to the Swift (and other) binaries if security is of concern.

14. Move or Resize Selected Area While Taking a Screenshot
Trick
Hold down the spacebar while selecting a region with Command-Shift-4.
Discussion
This is a wonderful trick that I only learned about a few months ago, despite having been a user of the screencapture keychord Command-Shift-4 on a daily basis for many years. While the great thing about this keychord is it lets you rapidly select a custom region, it can be frustrating if your starting position is a little off.
With this trick, you need not cancel with Esc and try again. Keep the mouse/trackpad pressed to avoid taking the shot, then simply hold down the space bar and move the cursor to reposition the selected region to where you want it. Release the space bar after repositioning and continue to adjust by dragging in the usual way if needed. Release the mouse/trackpad to take the shot.

With macOS Catalina 10.15, there is also the additional Command-Shift-5 keychord, which offers various options from a HUD style interface including specifying a different Save location from the default one.
15. Convert Cocoa Timestamp to Human Readable Date
Trick
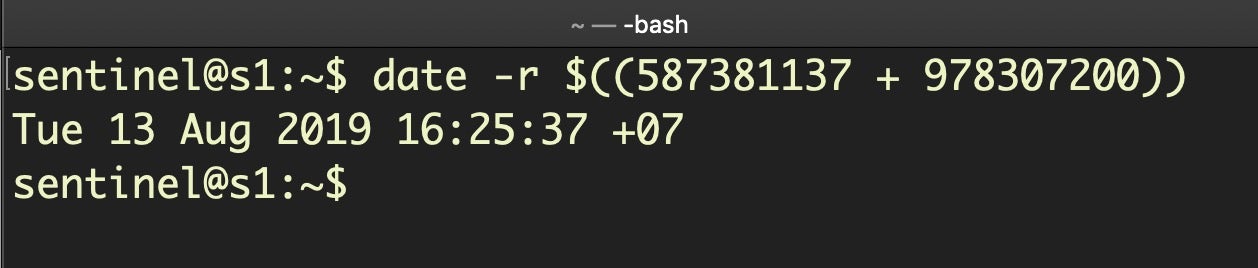
date -r $(( + 978307200))Discussion
This is a trick that I’ve mentioned before when discussing macOS Incident Response, but is well worth repeating here (not least to have as a handy reference). Unix epoch timestamps, which begin at from Mon, 1st January, 1970, 00:00:00, are in widespread use both across macOS and other operating systems, and converting them to a human readable form can be done on the command line using the date utility.
Less familiar are Cocoa timestamps, which take a similar form but often have a decimal representing fractions of a second appended, like 587381138.016775. The most important difference though is that Cocoa timestamps begin 31 years later than their Unix ancestors, on 1st January, 2001. Thus to convert a Cocoa timestamp using the date utility, we need to add the 31-year difference, which is 978307200 seconds. You can ignore the fractions of a second after the decimal point for most non-forensic purposes.
Conclusion
I hope that some of those will be new to you and prove to be useful in your own work on macOS. If you would like to know when we post more macOS content, then subscribe to the blog or follow SentinelOne on Twitter. If you want to see all our macOS related content in one easy to find place, then bookmark our dedicated macOS page. And, of course, if you’d like to share your own cool power tricks, hit me up on Twitter and let me know your macOS secrets – I would love to include them in a future post!
Like this article? Follow us on LinkedIn, Twitter, YouTube or Facebook to see the content we post.
Read more about Cyber Security
- Is Cryptojacking Going Out Of Fashion or Making A Comeback?
- The Stopwatch Is Ticking | How Ransomware Can Set a Breach Notification In Motion
- The CISO’s Quick Guide to Verizon’s 2020 Data Breach Investigations Report
- 7 Common Ways Ransomware Can Infect Your Organization
- Why On-Device Detection Matters: New Ramsay Trojan Targets Air-Gapped Networks
- Windows Security Essentials | Preventing 4 Common Methods of Credentials Exfiltration
- Hackers on Macs | What Are the Must-Have Apps & Tools?
Leave a Reply
Want to join the discussion?Feel free to contribute!